Did you know that overwatering kills 10 times more orchids than underwatering? This startling statistic from horticultural research reveals a harsh truth that every orchid enthusiast faces. While your intentions are pure—providing loving care for your exotic beauties—too much water often becomes their silent killer.
Here’s the challenge: unlike traditional houseplants that clearly droop when thirsty, orchids evolved as epiphytes in nature’s treetops, where their roots cling to bark and absorb moisture from humid air, not soggy soil. This fundamental difference means the watering wisdom that works for your pothos or snake plant can spell disaster for your prized Phalaenopsis or Cattleya.
In this comprehensive guide, I’ll walk you through 7 unmistakable signs that your orchid is drowning, plus provide you with an emergency rescue protocol that has saved countless plants in my 15 years of orchid cultivation. By the end of this article, you’ll possess the confidence to identify overwatering before it becomes fatal—and the expertise to nurse your orchid back to vibrant health.
Why Overwatering Kills More Orchids Than Underwatering
Understanding the physiological nightmare that excess water creates for orchids is crucial for any serious grower. Unlike terrestrial plants that evolved robust root systems to handle various moisture levels, orchid roots are architectural marvels designed for a completely different environment.
In their natural habitat, epiphytic orchids grow on tree bark, rocks, or other surfaces where their roots are exposed to air circulation and experience natural wet-dry cycles. Their roots contain specialized tissue called velamen—a spongy, silver-white coating that rapidly absorbs moisture during rain, then allows quick drying and gas exchange.
When we trap these sophisticated roots in constantly moist conditions, we disrupt their oxygen-dependent metabolism. Research from the Royal Horticultural Society demonstrates that orchid roots require oxygen levels similar to what they’d receive in open air. Waterlogged growing medium creates an anaerobic environment that suffocates root cells within 24-48 hours.
This oxygen deprivation triggers a cascade of problems: beneficial root microorganisms die off, harmful pathogens proliferate, and the root structure begins to decompose from the inside out. What appears as a simple “watering mistake” is actually the breakdown of millions of years of evolutionary adaptation.
7 Critical Overwatered Orchid Signs to Watch For
Early detection is your orchid’s lifeline. These seven signs progress from subtle early warnings to emergency red flags—knowing them could mean the difference between a quick recovery and permanent loss.
Yellow and Mushy Leaves
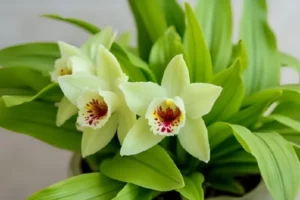
The first whisper of trouble often appears in the leaf tissue. Healthy orchid leaves should feel firm and maintain their natural color—whether that’s deep green, mottled patterns, or silvery-blue depending on your species.
Early warning signs include:
- Leaves becoming soft or squishy to the touch
- Yellow discoloration starting from the base and moving upward
- A watery, translucent appearance in leaf tissue
- Leaves that feel unnaturally cool compared to healthy foliage
This occurs because overwatered roots cannot properly regulate water uptake, causing cells to burst from excess fluid. University of Florida research shows that once leaf cells rupture from overhydration, they cannot recover—but catching this early means the root system may still be salvageable.
Root System Changes and Root Rot
Your orchid’s root system tells the most honest story about its health. Healthy orchid roots should be firm, plump, and typically white, green, or silvery in color when dry. Many species show green root tips during active growth periods.
Critical red flags include:
- Roots that feel mushy or hollow when gently squeezed
- Brown, black, or yellow discoloration throughout the root
- A foul, rotting smell emanating from the growing medium
- Roots that easily break or slip out of their outer coating when touched
- String-like appearance where only the inner root thread remains
The “squeeze test” is invaluable here: gently pinch a suspected root between your fingers. Healthy roots feel firm and resist pressure, while damaged roots collapse or feel like a wet sponge.
Crown Rot and Stem Issues
Crown rot represents a critical emergency that demands immediate action. The crown—where leaves emerge from the central growing point—should remain firm and maintain its natural color.
Danger signs include:
- Black or brown discoloration at the base of leaves
- Soft, mushy texture in the crown area
- Sweet, fermented smell near the plant’s center
- Leaves that easily lift away from the crown when touched gently
- New growth that appears black, brown, or translucent
Crown rot spreads rapidly because this area naturally collects moisture. Once bacteria or fungi establish themselves here, they have direct access to the plant’s vascular system. Research from the American Orchid Society indicates that crown rot can kill a plant within 7-10 days if left untreated.
Fungal Growth and Mold
Excessive moisture creates perfect conditions for opportunistic fungi and bacteria that rarely affect healthy orchids. These organisms thrive in the anaerobic conditions that waterlogged media provides.
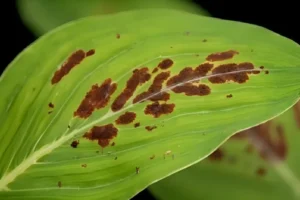
Visible warning signs include:
- White, gray, or green fuzzy growth on bark, moss, or other growing medium
- Black spots or patches on leaves, stems, or roots
- Slimy film coating roots or growing medium
- Unusual odors ranging from sweet to putrid
- Small mushrooms or toadstools emerging from the pot
Even if fungal growth appears only on the growing medium and not directly on your orchid, it indicates dangerously high moisture levels that will soon affect the plant’s health.
Wrinkled Pseudobulbs (for Sympodial Orchids)
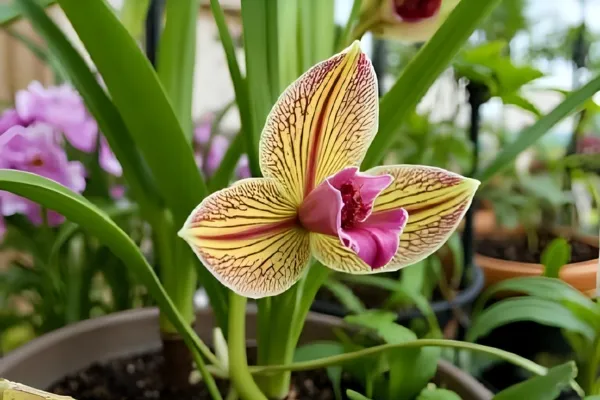
This sign specifically affects sympodial orchids like Cattleyas, Dendrobiums, and Oncidiums that store energy in pseudobulbs—the swollen stem structures that should appear plump and firm.
Concerning symptoms include:
- Pseudobulbs that appear deflated or wrinkled despite regular watering
- A soft, squishy texture when gently pressed
- Discoloration or dark spots on pseudobulb surfaces
- Separation between the pseudobulb and its root system
Paradoxically, overwatered sympodial orchids often show the same wrinkled pseudobulbs as underwatered plants. This occurs because damaged roots cannot uptake water effectively, even when surrounded by moisture. The plant essentially “starves” despite abundant water availability.
Loss of Aerial Roots
Many orchid species produce aerial roots—those silvery, snake-like extensions that emerge from the stem and grow into the air. These specialized structures are incredibly sensitive to environmental changes.
Warning indicators include:
- Aerial roots that turn brown or black
- Previously firm aerial roots becoming soft or hollow
- Aerial roots that detach easily from the main plant
- No new aerial root development despite appropriate growing season
- Existing aerial roots that stop showing green growing tips
Healthy aerial roots often serve as backup systems when primary roots fail. Their deterioration signals that environmental conditions have become hostile to the plant’s most adaptable structures.
Unusual Leaf Drop
While orchids naturally shed older leaves as part of their growth cycle, abnormal leaf loss often indicates systemic stress from overwatering.
Abnormal patterns include:
- Multiple leaves yellowing and dropping simultaneously
- Young, recently matured leaves falling before older ones
- Leaves dropping while still partially green
- Rapid leaf loss over 7-14 days
- Leaves that separate cleanly from the stem with gentle pressure
Normal leaf drop typically affects only the oldest leaves and occurs gradually over weeks or months. Sudden or excessive leaf loss indicates that the plant is redirecting all available energy toward survival rather than maintaining foliage.
How to Assess Root Health: The Definitive Guide
Accurate root assessment forms the foundation of successful orchid rescue. Unlike surface symptoms that can be misleading, root condition provides definitive insight into your plant’s actual health status.
Healthy vs. Damaged Root Identification
Healthy root characteristics:
- Firm, plump texture that resists gentle pressure
- White, green, or silvery coloration
- Smooth velamen coating without breaks or tears
- Fresh, neutral smell or slight earthy aroma
- Active growing tips that appear bright green or red
- Roots that anchor firmly in growing medium
Damaged root indicators:
- Soft, mushy, or hollow feeling when squeezed
- Brown, black, yellow, or gray discoloration
- Outer velamen coating that slips off easily
- Foul, rotting, or sweet fermented odor
- No visible growing tips or blackened tip areas
- Roots that pull away from growing medium easily
The “Squeeze Test” Technique
This simple diagnostic method, developed through decades of commercial orchid production, provides immediate feedback about root viability:
- Gentle pressure: Using thumb and forefinger, apply light pressure to suspected roots
- Immediate assessment: Healthy roots feel firm and spring back; damaged roots collapse or feel spongy
- Visual confirmation: Squeeze-damaged roots often release brown or black liquid
- Decisive action: Any root that fails the squeeze test should be removed immediately
Professional orchid growers rely on this technique because it reveals internal root condition that visual inspection alone might miss.
Emergency Rescue Protocol for Overwatered Orchids
Time becomes critical once you’ve identified overwatering damage. This step-by-step protocol, refined through countless rescue operations, maximizes your orchid’s chances of complete recovery.
Immediate Steps to Take
Within the first 24 hours:
- Stop all watering immediately—even if growing medium appears dry on surface
- Remove the plant from its current pot carefully, preserving as much healthy root material as possible
- Rinse root system gently under lukewarm running water to remove old growing medium
- Assess damage thoroughly using visual inspection and squeeze testing
- Document current condition with photos for future reference
Environmental adjustments:
- Increase air circulation around the plant using fans
- Reduce humidity levels temporarily to prevent further fungal development
- Provide bright, indirect light to support recovery without stress
- Maintain temperatures between 65-75°F (18-24°C) for optimal healing
Root System Rehabilitation
Surgical intervention may sound dramatic, but removing damaged tissue prevents infection spread and allows healthy portions to recover:
- Sterilize cutting tools with 70% rubbing alcohol or 10% bleach solution
- Remove all damaged roots by cutting at least 1 inch above any soft, discolored, or hollow areas
- Apply antifungal treatment using cinnamon powder, rooting hormone with fungicide, or commercial orchid fungicide
- Allow cut surfaces to callus for 2-4 hours in a well-ventilated area before repotting
Root rehabilitation timeline:
- Days 1-3: Focus on removing damage and preventing infection
- Week 1-2: Monitor for new rot development and adjust environment
- Week 3-4: Look for early signs of new root development
- Month 2-3: Resume very light fertilization once new growth appears
Repotting Technique for Recovery
Choosing appropriate growing medium and pot size dramatically influences recovery success:
Growing medium selection:
- Use extremely well-draining mix: 70% bark, 20% perlite, 10% moss
- Avoid any organic materials that retain moisture
- Consider pure bark or inorganic media for severely damaged plants
- Ensure all components are fresh and sterile
Repotting procedure:
- Select smaller pot than original—damaged root systems support less plant mass
- Create drainage layer using large bark pieces or clay pellets
- Position plant carefully to avoid burying aerial roots or crown
- Secure gently using stakes if necessary, without compacting medium
- Water minimally for first 2-3 weeks, monitoring recovery progress
Prevention: Creating the Perfect Watering Schedule
Preventing overwatering requires understanding your specific orchid’s needs, environmental conditions, and growth patterns. This systematic approach eliminates guesswork and establishes sustainable care routines.
Understanding Your Orchid Species’ Needs
Different orchid groups evolved in distinct habitats with unique moisture requirements:
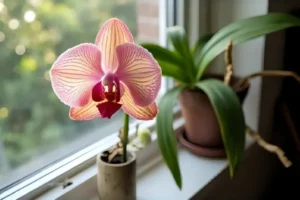
Phalaenopsis (Moth Orchids):
- Prefer consistent slight moisture without complete drying
- Water when top inch of medium feels dry
- Typical frequency: every 7-10 days in average home conditions
Cattleyas and Allied Genera:
- Require distinct wet-dry cycles
- Allow complete drying between waterings
- Typical frequency: every 10-14 days, varying by season
Dendrobiums:
- Most species prefer drying completely between waterings
- Some varieties require winter rest with minimal water
- Typical frequency: every 7-10 days in growth season
Oncidiums and Intergenerics:
- Prefer consistent slight moisture
- Never allow complete drying but avoid saturation
- Typical frequency: every 5-7 days with environmental monitoring
Environmental Factors That Affect Watering
Your local environment dramatically influences how quickly orchids process water:
Temperature effects:
- Higher temperatures (75°F+) increase water consumption
- Lower temperatures (60-65°F) slow metabolism and reduce water needs
- Seasonal variations require schedule adjustments
Humidity levels:
- High humidity (60-70%) extends time between waterings
- Low humidity (30-40%) increases watering frequency
- Use humidity trays to stabilize moisture levels
Air circulation:
- Good airflow accelerates drying and prevents stagnation
- Poor circulation extends drying time and increases disease risk
- Position fans to provide gentle, constant air movement
Growing medium composition:
- Bark-heavy mixes drain quickly and require more frequent watering
- Moss-heavy mixes retain moisture longer
- Inorganic media provides most predictable drainage patterns
Tools and Techniques for Monitoring
Professional orchid growers rely on objective measurement rather than guesswork:
Essential monitoring tools:
- Moisture meter: Provides accurate readings 2-3 inches deep in medium
- Wooden skewer test: Insert clean skewer into medium; dry wood indicates ready for water
- Weight method: Lift pots to feel weight difference between wet and dry conditions
- Clear pot advantage: Allows visual root and moisture assessment
Weekly monitoring routine:
- Check moisture levels using preferred method
- Inspect roots for color changes or new growth
- Assess environmental conditions (temperature, humidity, airflow)
- Record observations to identify patterns over time
- Adjust schedule based on seasonal and growth stage changes
Conclusion
Recognizing overwatered orchid signs early transforms from crisis management into confident plant parenting. The seven critical indicators we’ve explored—from yellowing leaves to crown rot—serve as your early warning system, while the emergency rescue protocol provides proven recovery strategies when intervention becomes necessary.
Remember that prevention through understanding remains far superior to even the most skillful rescue operation. By matching your watering schedule to your orchid’s species requirements, environmental conditions, and seasonal patterns, you create the stable, well-drained conditions these remarkable plants evolved to thrive in.
As you continue your orchid journey, trust in the diagnostic skills you’ve developed and the systematic approach we’ve outlined. Every orchid saved through early intervention becomes invaluable experience for future challenges. The path from novice to confident orchid grower is paved with exactly this kind of knowledge—turning potential disasters into opportunities for deeper understanding.
Your orchids will reward your newfound expertise with robust growth, spectacular blooms, and the satisfaction that comes from providing truly optimal care for some of nature’s most extraordinary creations.
Frequently Asked Questions
How quickly can an overwatered orchid die?
Severely overwatered orchids can show critical damage within 24-48 hours, with complete plant death possible within 7-14 days if crown rot develops. However, early-stage overwatering may take weeks to manifest visible symptoms, making regular monitoring essential.
Can an orchid recover from complete root loss?
While challenging, orchids can recover from extensive root damage if the crown remains healthy. Recovery typically takes 3-6 months and requires extremely careful environmental control, minimal watering, and often specialized growing techniques like sphagnum moss therapy.
What’s the difference between overwatering and crown rot?
Overwatering refers to providing water too frequently or in excessive amounts, while crown rot is a specific bacterial or fungal infection that often results from overwatering. Crown rot represents a more serious, time-critical condition requiring immediate intervention.
Should I repot an orchid immediately after buying it?
Only if you observe signs of overwatering or poor-quality growing medium. Healthy orchids prefer minimal disturbance, so repotting should occur only when necessary—typically every 1-2 years or when problems arise.
How long should I wait to water after repotting an overwatered orchid?
Wait 7-10 days minimum after repotting to allow any cut root surfaces to heal. Then begin with very light watering—just enough to barely moisten the growing medium—while monitoring closely for signs of new growth or continuing problems.