Did you know that Vanda orchids produce some of the most vibrant blue flowers in the entire plant kingdom, yet only 15% of home growers successfully achieve consistent blooming? These magnificent epiphytic beauties, native to Southeast Asia, have captivated orchid enthusiasts for centuries with their spectacular aerial displays and intoxicating fragrance.
The challenge with Vanda orchids is real. Unlike their more forgiving cousins like Phalaenopsis or Dendrobium, Vandas demand precise environmental conditions that mimic their native tropical canopies. Many new growers become frustrated when their expensive Vanda specimens fail to bloom, lose roots, or simply decline despite their best intentions. The most common mistakes? Improper watering schedules, inadequate light exposure, and misunderstanding their unique aerial root system.
Here’s what I promise you’ll learn: By the end of this comprehensive guide, you’ll master the exact techniques used by professional orchid growers to cultivate thriving Vanda orchids. You’ll discover the daily care routine that ensures robust root development, the precise watering schedule that prevents root rot while maintaining optimal hydration, and the proven fertilization strategy that triggers spectacular blooming cycles year after year.
Understanding Vanda Orchids: What Makes Them Unique
Epiphytic Nature and Natural Habitat
Vanda orchids are true epiphytes, meaning they naturally grow attached to trees in tropical rainforests without parasitizing their hosts. According to research from the Royal Botanic Gardens, Kew, these orchids have evolved specialized aerial roots that absorb moisture and nutrients directly from the humid air.
In their native habitats across Thailand, Myanmar, and the Philippines, Vandas experience:
- Daily temperatures ranging from 75-85°F (24-29°C)
- Humidity levels consistently above 70%
- Filtered sunlight through dense canopy layers
- Constant air circulation from tropical breezes
Understanding this natural environment is crucial for successful cultivation. Your Vanda isn’t trying to be difficult – it’s simply evolved for very specific conditions that we must replicate indoors.
Root System Characteristics
Vanda roots are absolutely fascinating and completely different from terrestrial plants. These thick, silvery-green aerial roots serve multiple functions:
Primary Functions:
- Moisture absorption from atmospheric humidity
- Nutrient uptake from decomposing organic matter
- Structural support for anchoring to host trees
- Photosynthesis through chlorophyll in root tissues
The University of Florida’s IFAS Extension notes that healthy Vanda roots should appear plump and green when wet, turning silver when dry. Brown, mushy, or hollow roots indicate problems that require immediate attention.
Popular Vanda Varieties for Beginners
Not all Vandas are equally challenging. These varieties offer the best success rates for newcomers:
Beginner-Friendly Options:
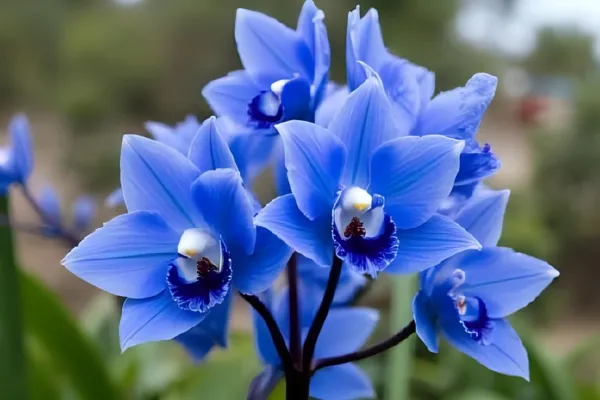
- Vanda coerulea: The blue Vanda, more temperature tolerant
- Vanda tricolor: Hardy with fragrant flowers
- Vanda Robert’s Delight: Compact hybrid, easier care
- Vanda Miss Joaquim: Singapore’s national flower, very resilient
Advanced Varieties: Save these for later:
- Vanda sanderiana: Requires expert-level care
- Vanda lamellata: Extremely humidity-dependent
Essential Vanda Orchid Care Requirements
Light Requirements and Positioning
Light is absolutely critical for Vanda orchid success. According to Cornell University’s Department of Horticulture, Vandas require high light intensity – approximately 2,000-4,000 foot-candles for optimal growth and flowering.
Indoor Light Solutions:
- South-facing windows: Provide morning sun with afternoon protection
- LED grow lights: 40-60 watts per square foot, 12-14 hours daily
- Fluorescent systems: T5 high-output tubes, 6 inches from plants
Light Intensity Indicators:
- Too little: Dark green leaves, no flowering, elongated growth
- Perfect: Light green leaves with slight purple tinting
- Too much: Yellow leaves, brown burn spots, stunted growth
Pro Tip: Gradually acclimate your Vanda to higher light levels over 2-3 weeks to prevent shock.
Temperature and Humidity Control
Temperature stability is crucial for Vanda health. Research from the American Orchid Society shows that temperature fluctuations greater than 15°F can trigger stress responses and blooming delays.
Optimal Temperature Ranges:
- Daytime: 75-85°F (24-29°C)
- Nighttime: 65-70°F (18-21°C)
- Temperature drop: 10-15°F difference between day/night
Humidity Management: Vandas absolutely require high humidity – minimum 60%, ideally 70-80%. Here’s how to achieve this:
Effective Humidity Solutions:
- Humidifiers: Ultrasonic models prevent mineral buildup
- Humidity trays: Fill with expanded clay pebbles and water
- Grouping plants: Creates beneficial microclimate
- Air circulation: Essential to prevent fungal issues
Warning Signs of Low Humidity:
- Wrinkled, accordion-like leaves
- Brown leaf tips
- Poor root development
- Bud blast (flower buds dropping)
Air Circulation Needs
Stagnant air is deadly for Vandas. The Missouri Botanical Garden emphasizes that proper air movement prevents fungal diseases and assists in nutrient transport.
Air Circulation Setup:
- Ceiling fans: Set on low, indirect airflow
- Oscillating fans: 3-4 feet away, gentle movement
- Natural ventilation: Open windows when weather permits
- Exhaust fans: Remove excess moisture in closed systems
Aim for gentle leaf movement – you should see leaves slightly swaying, not whipping violently.
Mastering Vanda Orchid Watering Techniques
Daily Watering Schedule
This might surprise you, but Vandas typically need daily watering during growing season. Their aerial root system dries quickly and requires consistent moisture availability.
Optimal Watering Schedule:
- Summer/Growing Season: Daily, early morning
- Winter/Dormant Period: Every 2-3 days
- Rainy/High Humidity Days: Skip watering, monitor roots
Watering Method: Water thoroughly until you see water dripping from the bottom roots. The entire root system should turn from silver to green – this color change indicates proper saturation.
Water Quality and Treatment
Water quality dramatically affects Vanda health. Studies from UC Davis Agricultural Extension show that poor water quality is the leading cause of cultivation failures.
Water Quality Requirements:
- TDS (Total Dissolved Solids): Under 200 ppm
- pH Level: 6.0-6.5 (slightly acidic)
- Chlorine/Chloramine: Must be removed or neutralized
Water Treatment Options:
- Rainwater: Ideal natural choice
- Reverse osmosis: Most reliable for consistent quality
- Distilled water: Acceptable but lacks beneficial minerals
- Tap water: Use only if TDS under 150 ppm
Pro Tip: Let tap water sit 24 hours to allow chlorine to evaporate before using.
Seasonal Watering Adjustments
Vandas experience natural seasonal cycles that require watering adjustments. The Smithsonian Institution’s Orchid Collection documents these patterns:
Spring (March-May):
- Increase watering frequency as growth resumes
- Begin daily watering schedule
- Monitor for new root development
Summer (June-August):
- Peak growing season, daily watering essential
- Higher humidity requirements
- Watch for heat stress signs
Fall (September-November):
- Gradually reduce watering frequency
- Prepare for dormancy period
- Focus on root health maintenance
Winter (December-February):
- Reduce to every 2-3 days
- Lower humidity acceptable
- Avoid fertilizing during dormancy
Fertilizing Your Vanda Orchid for Maximum Blooms
NPK Ratios and Nutrient Requirements
Vandas are surprisingly heavy feeders compared to other orchids. Research from Michigan State University Extension shows that consistent, balanced nutrition is essential for reliable flowering.
Recommended NPK Ratios:
- Growing Season: 20-20-20 or 20-10-20
- Blooming Phase: 10-30-20 (higher phosphorus)
- Winter/Dormant: No fertilization needed
Essential Micronutrients:
- Calcium: Prevents bud blast and strengthens cell walls
- Magnesium: Central to chlorophyll production
- Iron: Prevents chlorosis and yellowing
- Manganese: Enzyme activation for growth processes
Application Methods and Frequency
Fertilization Schedule:
- Active Growth: Weekly at 1/4 strength concentration
- Blooming Period: Bi-weekly with bloom booster formula
- Winter Rest: Cease fertilization completely
Application Techniques:
- Root Application: Pour diluted fertilizer directly over roots
- Foliar Feeding: Spray weak solution on leaves (morning only)
- Mounting Medium: If using bark chips, water in thoroughly
Dilution Guidelines: Always use fertilizer at 1/4 the recommended strength. Vandas prefer frequent, weak feeding over occasional strong applications.
Signs of Over and Under-fertilization
Over-fertilization Symptoms:
- Salt buildup on roots (white crystalline deposits)
- Brown, burnt leaf tips
- Excessive vegetative growth without flowering
- Root damage and dieback
Under-fertilization Symptoms:
- Pale yellow-green foliage
- Slow or stunted growth
- Poor flower production
- Overall plant weakness
Recovery Protocol: If you suspect over-fertilization, flush the root system with pure water for several days, then resume feeding at reduced concentration.
Advanced Vanda Care Tips for Experienced Growers
Repotting and Root Management
Unlike terrestrial orchids, Vandas rarely need traditional repotting. However, they do require periodic root maintenance and mounting adjustments.
When to Intervene:
- Mounting material deteriorating
- Root system outgrowing container
- Persistent pest problems
- Medium breakdown causing drainage issues
Repotting Process:
- Remove from current mount carefully, preserving healthy roots
- Trim damaged roots with sterilized tools
- Clean mounting surface with diluted hydrogen peroxide
- Secure plant with soft ties, avoiding root pressure
- Allow 1-2 weeks recovery before resuming normal care
Alternative Mounting Options:
- Tree fern fiber: Excellent drainage and root attachment
- Cork bark: Natural, long-lasting option
- Hardwood mounts: Cedar or teak for durability
- Basket cultivation: Allows maximum air circulation
Pest Prevention and Treatment
Vandas can attract several common orchid pests. Prevention through good cultural practices is always preferable to treatment.
Common Pests and Solutions:
| Pest | Identification | Treatment |
|---|---|---|
| Spider Mites | Fine webbing, stippled leaves | Increase humidity, miticide spray |
| Scale Insects | Brown/white bumps on leaves | Alcohol wipes, systemic insecticide |
| Mealybugs | White cottony masses | Isopropyl alcohol treatment |
| Thrips | Silver streaks on leaves | Sticky traps, predatory mites |
Integrated Pest Management:
- Weekly inspections during watering
- Quarantine new plants for 30 days minimum
- Beneficial insects like predatory mites
- Horticultural oils for prevention
Encouraging Reblooming
Getting Vandas to rebloom consistently requires understanding their natural cycles and providing appropriate triggers.
Blooming Requirements:
- Mature plant size: Minimum 12-18 inches tall
- Adequate light: 2,000+ foot-candles year-round
- Temperature differential: 10-15°F day/night variation
- Proper nutrition: Regular feeding during growth season
Blooming Triggers:
- Seasonal temperature changes: Mimic natural climate patterns
- Reduced watering: Brief dry period can stimulate flowering
- High phosphorus fertilizer: Switch to bloom booster formula
- Stress factors: Slightly root-bound conditions
Most Vandas bloom once or twice yearly, typically in spring and fall. Patience is essential – young plants may take 2-3 years to reach blooming maturity.
Conclusion
Mastering Vanda orchid care requires dedication, but the rewards are extraordinary. These magnificent epiphytes offer some of the most spectacular flowers in the orchid world, with their vibrant blues, purples, and complex patterns creating living artwork in your collection.
Key Success Factors:
- Consistent daily watering with quality water
- High light intensity with proper protection
- Excellent air circulation and humidity control
- Regular but diluted fertilization during growing season
- Patient observation and gradual adjustments
Remember that Vanda cultivation is a journey, not a destination. Each plant will teach you something new about these fascinating organisms. Start with beginner-friendly varieties, maintain consistent care routines, and don’t be discouraged by initial challenges.
Looking ahead, climate change is affecting natural Vanda habitats, making cultivation knowledge more important than ever. By mastering these techniques, you’re not just growing beautiful orchids – you’re participating in conservation efforts and preserving horticultural knowledge for future generations.
The key to success lies in understanding that Vandas aren’t difficult plants – they’re simply specialized for very particular conditions. Once you provide those conditions consistently, you’ll be rewarded with years of spectacular blooming and the deep satisfaction that comes from mastering one of orchiddom’s most challenging genera.
Frequently Asked Questions
How often should I water my Vanda orchid?
During growing season (spring through fall), water daily in the morning. In winter, reduce to every 2-3 days. Always check that roots turn from silver to green, indicating proper saturation.
Why aren’t the roots of my Vanda orchid green?
Healthy Vanda roots change color based on moisture content. Silver/white roots are dry but healthy, while green indicates hydration. Brown or mushy roots suggest overwatering or poor water quality.
Can Vandas survive in lower light conditions?
Vandas require high light intensity (2,000-4,000 foot-candles) for optimal growth and flowering. Lower light results in dark green foliage, poor flowering, and eventual decline. Supplement with LED grow lights if necessary.
How long does it take for a Vanda to bloom?
Mature Vandas typically bloom once or twice yearly. Young plants may take 2-3 years to reach blooming size. Consistent care, adequate light, and proper nutrition are essential for reliable flowering.
What’s the white buildup on my Vanda’s roots?
White crystalline deposits usually indicate salt buildup from over-fertilization or poor water quality. Flush roots with pure water for several days, then reduce fertilizer concentration and check water TDS levels.
Should I mist my Vanda orchid leaves?
Light morning misting can help with humidity, but ensure excellent air circulation to prevent fungal issues. Never mist in evening or when air circulation is poor. Focus on maintaining ambient humidity rather than leaf misting.