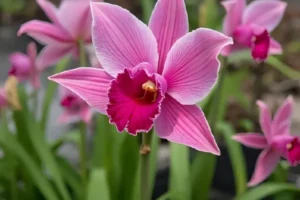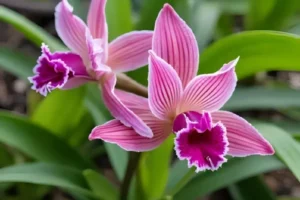
Did you know that cymbidium orchids can live for over 50 years and produce stunning flower spikes with up to 30 blooms each? These magnificent orchids, originally discovered in the Himalayan mountains, have captured the hearts of orchid enthusiasts worldwide with their spectacular displays and surprisingly manageable care requirements.
Yet despite their reputation as “beginner-friendly,” many new cymbidium owners struggle with basic care questions: Why won’t my orchid bloom? Are those brown leaf tips normal? How often should I water? When is the right time to repot? These uncertainties can turn the joy of orchid ownership into a source of frustration and disappointment.
In this comprehensive guide, I’ll share 15 years of hands-on cymbidium expertise to transform you from a nervous beginner into a confident grower. You’ll discover the exact care routine that ensures healthy growth, learn to recognize and solve common problems before they become serious, and master the techniques that encourage those breathtaking flower displays year after year.
What Makes Cymbidium Orchids Special? Understanding the Basics
Cymbidium orchids stand out in the orchid family for several remarkable reasons. Unlike their tropical cousins, these terrestrial orchids originated in the cool, mountainous regions of Asia, making them exceptionally well-suited for home cultivation.
The Cymbidium Advantage
Temperature tolerance sets cymbidiums apart from most orchids. Research from the American Orchid Society shows that cymbidiums thrive in temperatures ranging from 50°F to 85°F (10°C to 29°C), making them perfect for standard home environments.
Longevity is another standout feature. According to botanical studies from Kew Gardens, properly cared-for cymbidiums can produce flowers annually for decades, with some specimens documented to be over 100 years old.
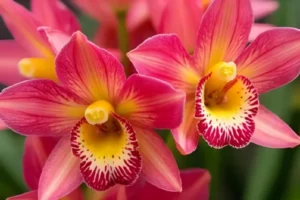
Bloom characteristics make cymbidiums particularly rewarding:
- Flowers last 8-12 weeks when properly maintained
- Single spikes can support 15-30 individual blooms
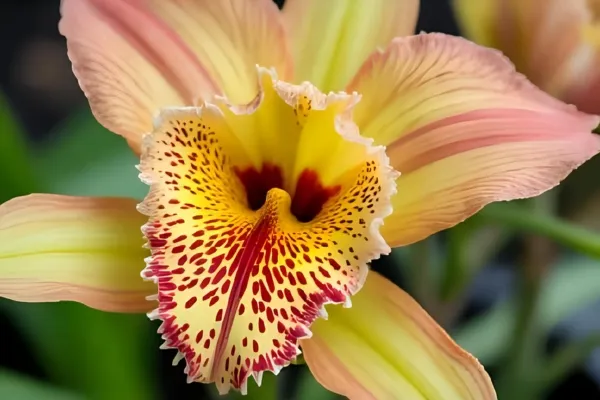
- Available in over 50 natural color variations
- Flowers often display intricate patterns and fragrant qualities
Understanding Your Plant’s Natural Habitat
Cymbidiums evolved in environments with distinct seasonal changes. This evolutionary background explains their specific care requirements and why they need a winter cooling period to initiate blooming.
In their native Himalayan habitat, cymbidiums experience:
- Cool, dry winters (40-60°F)
- Warm, humid summers (70-85°F)
- Bright, filtered light through forest canopies
- Well-draining, organic-rich growing medium
Replicating these conditions in your home environment forms the foundation of successful cymbidium care.
Essential Cymbidium Care Requirements: The Foundation of Success
Success with cymbidiums depends on mastering five fundamental care elements. Each element works synergistically with the others to create optimal growing conditions.
Temperature Management
Ideal temperature ranges vary by season:
- Growing season (spring/summer): 65-85°F (18-29°C) during day, 55-65°F (13-18°C) at night
- Dormant season (fall/winter): 50-65°F (10-18°C) during day, 40-55°F (4-13°C) at night
Temperature differential is crucial. Research from Cornell University’s orchid program demonstrates that cymbidiums require a 10-15°F difference between day and night temperatures to trigger proper physiological processes.
Humidity Requirements
Maintain 50-70% relative humidity around your cymbidium. This mimics their natural mountain environment where morning dew and afternoon mists provide consistent moisture.
Practical humidity solutions:
- Humidity trays filled with water and pebbles
- Room humidifiers set to 60%
- Grouping plants together to create microclimates
- Avoiding placement near heating vents or air conditioners
Air Circulation Essentials
Good air movement prevents fungal issues and strengthens plant tissues. Ensure gentle air circulation using:
- Ceiling fans on low speed
- Small oscillating fans positioned away from direct plant contact
- Strategic window placement for natural airflow
Avoid strong drafts or stagnant air, both of which stress cymbidiums and increase disease susceptibility.
Mastering Cymbidium Watering: The Most Critical Skill
Watering represents the most common source of cymbidium problems, yet it’s entirely manageable once you understand the principles.
The Golden Watering Rule
Water thoroughly when the top inch of potting medium feels dry. This typically translates to watering every 5-7 days during active growth and every 10-14 days during dormancy.
Seasonal Watering Adjustments
Spring and Summer (Active Growth):
- Water when potting medium is 50% dry
- Frequency: Every 5-7 days
- Volume: Water until it flows freely from drainage holes
- Timing: Morning watering allows excess moisture to evaporate
Fall and Winter (Dormant Period):
- Water when potting medium is 75% dry
- Frequency: Every 10-14 days
- Volume: Less water, ensuring medium doesn’t become bone dry
- Timing: Mid-morning to prevent overnight moisture retention
Water Quality Considerations
Ideal water characteristics:
- pH level: 6.0-7.0 (slightly acidic to neutral)
- Total dissolved solids: Under 150 ppm
- Temperature: Room temperature (65-75°F)
Water quality solutions:
- Use rainwater when possible
- Filter tap water through activated carbon filters
- Allow tap water to sit 24 hours to dissipate chlorine
- Avoid water softened with salt systems
Signs of Watering Issues
Overwatering symptoms:
- Yellowing leaves starting from bottom
- Soft, mushy pseudobulbs
- Strong odor from potting medium
- Black or brown root tips
Underwatering symptoms:
- Wrinkled, accordion-like pseudobulbs
- Silvery-gray roots
- Dry, crispy leaf edges
- Stunted new growth
Light Requirements and Placement: Creating the Perfect Environment
Cymbidiums need specific light conditions to photosynthesize effectively and initiate blooming. Understanding these requirements helps you position your orchid for optimal success.
Optimal Light Levels
Cymbidiums require bright, indirect light equivalent to 2,000-4,000 foot-candles. This translates to approximately 50-70% of full sunlight.
Practical light measurement:
- Use a light meter app on your smartphone
- Position plants where you can comfortably read without strain
- Observe leaf color as an indicator (see below)
Seasonal Light Adjustments
Spring and Summer:
- East-facing windows provide ideal morning sun
- South-facing windows need sheer curtains for filtering
- Outdoor placement under 50% shade cloth works excellently
Fall and Winter:
- Move to brighter locations as sun intensity decreases
- South-facing windows often become appropriate
- Supplement with grow lights if necessary
Reading Your Plant’s Light Signals
Leaf color indicators:
- Dark green leaves: Too little light, may prevent blooming
- Light green to yellow-green: Perfect light levels
- Red or purple tints: Slightly too much light but acceptable
- Brown or black spots: Too much direct sun, causing burns
Artificial Lighting Solutions
When natural light is insufficient, supplement with:
- LED grow lights: 40-50 watts per square foot
- Fluorescent tubes: T5 or T8, positioned 12-18 inches above plants
- Duration: 12-14 hours daily during growing season, 10-12 hours during dormancy
Repotting Your Cymbidium: When, Why, and How
Repotting maintains root health and provides fresh nutrients essential for vigorous growth and blooming.
When to Repot
Timing indicators:
- Every 2-3 years as a standard practice
- Potting medium breaks down and becomes soggy
- Roots growing over pot edges
- Pseudobulbs outgrowing current container
- Evidence of root rot or pest problems
Best timing: Late winter or early spring, just as new growth begins emerging.
Choosing the Right Potting Medium
Recommended mixture proportions:
- 40% medium-grade fir bark
- 30% coarse perlite
- 20% coconut coir or sphagnum moss
- 10% coarse sand or pumice
This combination provides:
- Excellent drainage to prevent root rot
- Adequate moisture retention
- Good aeration for healthy root development
- Slow decomposition for longevity
Step-by-Step Repotting Process
Preparation phase:
- Soak new potting medium for 30 minutes
- Sterilize tools with rubbing alcohol
- Choose pot only 1-2 inches larger than current container
Repotting procedure:
- Remove plant carefully from old pot, supporting pseudobulbs
- Clean roots thoroughly under lukewarm running water
- Trim dead or rotted roots with sterilized scissors
- Remove old potting medium completely from root system
- Position in new pot with oldest pseudobulbs against one edge
- Fill with fresh medium, ensuring roots make good contact
- Water lightly and place in bright, indirect light
Post-Repotting Care
- Reduce watering frequency for 2-3 weeks
- Avoid fertilizing for one month
- Monitor for signs of transplant shock
- Expect some leaf yellowing as normal adjustment response
Common Problems and Expert Solutions
Even experienced growers encounter challenges. Recognizing and addressing issues early prevents minor problems from becoming major setbacks.
Pest Management
Scale insects appear as small, brown bumps on leaves and pseudobulbs:
- Treatment: Dab with rubbing alcohol using cotton swabs
- Prevention: Regular inspection and good air circulation
- Severe infestations: Systemic insecticide following label directions
Spider mites cause silvery stippling on leaves:
- Treatment: Increase humidity and use insecticidal soap
- Prevention: Maintain 60%+ humidity levels
- Natural control: Predatory mites available from specialty suppliers
Aphids cluster on new growth and flower spikes:
- Treatment: Rinse with water or use insecticidal soap
- Prevention: Regular monitoring during peak growing season
- Organic control: Ladybugs or lacewings for biological control
Disease Prevention and Treatment
Root rot from excessive moisture:
- Symptoms: Black, mushy roots with foul odor
- Treatment: Remove affected roots, repot in fresh medium
- Prevention: Proper drainage and appropriate watering schedule
Bacterial soft rot affecting pseudobulbs:
- Symptoms: Dark, water-soaked areas that spread rapidly
- Treatment: Cut away affected tissue, treat with fungicide
- Prevention: Good air circulation and avoiding overhead watering
Environmental Stress Solutions
Brown leaf tips from low humidity or water quality issues:
- Increase humidity around plant
- Switch to distilled or rainwater
- Trim brown areas with sterilized scissors
Failure to bloom despite healthy growth:
- Ensure proper winter cooling period (50-60°F nights)
- Verify adequate light levels (bright indirect light)
- Check fertilization schedule (reduce nitrogen in fall)
- Be patient – mature plants may skip occasional blooming years
Encouraging Blooms: Advanced Tips for Spectacular Flowers
Achieving reliable blooming requires understanding cymbidium flowering physiology and providing appropriate environmental triggers.
The Science of Blooming
Research from the Royal Horticultural Society demonstrates that cymbidium blooming depends on:
- Temperature differential: 10-15°F between day and night
- Photoperiod changes: Shorter days triggering dormancy response
- Nutritional status: Proper phosphorus and potassium levels
- Plant maturity: Pseudobulbs must reach sufficient size and age
Creating Blooming Conditions
Fall preparation (September-November):
- Reduce nighttime temperatures to 50-60°F
- Decrease watering frequency by 25%
- Eliminate nitrogen fertilizer completely
- Provide maximum light without burning
Winter maintenance (December-February):
- Maintain cool night temperatures consistently
- Water only when medium approaches dryness
- Continue bright light exposure
- Watch for emerging flower spikes
Fertilization for Blooming
Growing season feeding (March-August):
- Use balanced fertilizer (20-20-20) at quarter strength
- Feed every other watering
- Include trace elements monthly
Bloom preparation feeding (September-November):
- Switch to low-nitrogen, high-phosphorus fertilizer (10-30-20)
- Reduce feeding frequency to monthly
- Discontinue all fertilization during blooming
Flower Spike Care
When flower spikes emerge:
- Support developing spikes with bamboo stakes
- Maintain consistent conditions to prevent bud drop
- Avoid moving plant once buds begin developing
- Increase humidity around developing flowers
Extending bloom life:
- Keep flowers cool (60-70°F)
- Provide bright, indirect light
- Maintain good air circulation
- Remove spent flowers to encourage others
Frequently Asked Questions
How long does it take for a cymbidium to bloom from a young plant?
Typically 3-5 years from a small division. Plants need to develop 4-6 mature pseudobulbs before reliably blooming. Patience during this establishment period is essential.
Can cymbidiums be grown outdoors year-round?
In USDA zones 9-11, yes. In cooler zones, they benefit from outdoor summer placement but need winter protection. Many growers successfully use unheated greenhouses or garages for winter storage.
Why are my cymbidium leaves turning yellow?
Natural aging causes bottom leaves to yellow and drop. However, widespread yellowing indicates overwatering, insufficient light, or nutrient deficiency. Examine care conditions systematically.
How often should I divide my cymbidium?
Every 3-4 years or when the plant significantly outgrows its pot. Each division should have at least 3-4 pseudobulbs for best survival chances.
Is it normal for flower spikes to take months to develop?
Absolutely. From initial spike emergence to first flower opening typically takes 3-4 months. This extended development period allows for spectacular final displays.