Did you know that over 85% of orchid enthusiasts start their journey with indoor cultivation? According to recent horticultural surveys from the American Orchid Society, indoor orchid growing has exploded in popularity, with millions of households now successfully nurturing these exotic beauties in their living spaces.
Yet despite this growing trend, many potential orchid parents hesitate to take the plunge. The persistent myth that orchids are “impossible” or “too temperamental” for indoor growing continues to intimidate countless plant lovers. You’ve probably heard the stories: withered blooms, mysterious plant deaths, and frustrated attempts that ended in expensive disappointment.
Here’s the truth that changes everything: growing orchids indoors is not only possible—it’s often easier than caring for many common houseplants when you understand their simple, specific needs. In this comprehensive guide, I’ll walk you through every essential aspect of indoor orchid cultivation, from selecting your first plant to mastering the art of reblooming. By the end of this article, you’ll have the confidence and knowledge to transform any room in your home into a thriving orchid sanctuary.
Understanding Indoor Orchid Basics
What Makes Orchids Perfect Houseplants
Orchids are naturally epiphytic plants, meaning they grow on other plants in their native habitats rather than in soil. This characteristic makes them surprisingly well-suited for indoor cultivation. Research from the Royal Botanic Gardens at Kew demonstrates that orchids’ aerial root systems actually thrive in the controlled environments we can create indoors.
Unlike traditional houseplants that require constant soil moisture, orchids prefer the “feast and famine” watering approach that’s much more forgiving for busy lifestyles. Their ability to store water in specialized organs called pseudobulbs means they can tolerate occasional neglect—a feature that makes them ideal for modern indoor gardening.
Most importantly, orchids don’t require outdoor temperature fluctuations to bloom. Studies from Cornell University’s Department of Horticulture confirm that consistent indoor temperatures between 65-80°F provide optimal growing conditions for most popular orchid varieties.
Common Indoor Orchid Varieties for Beginners
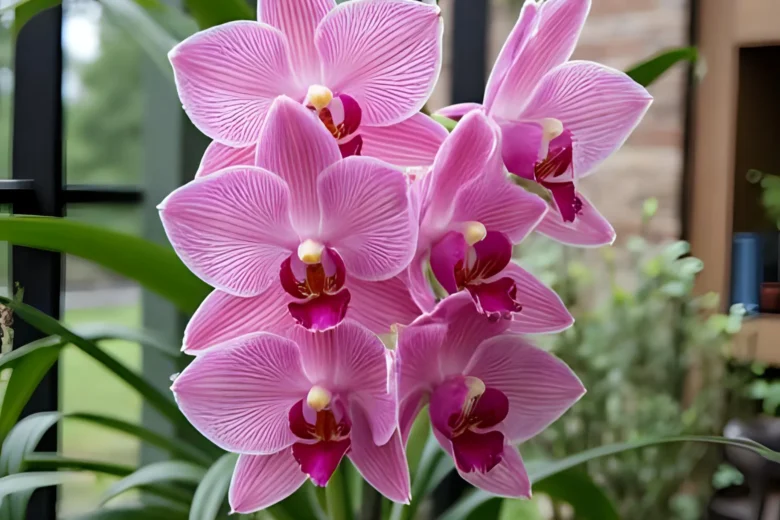
Phalaenopsis (Moth Orchids) are the undisputed champions of indoor cultivation. These elegant beauties tolerate low light conditions better than any other orchid variety and can bloom for 3-6 months with proper care. Their thick, leathery leaves indicate drought tolerance, making them perfect for beginners.
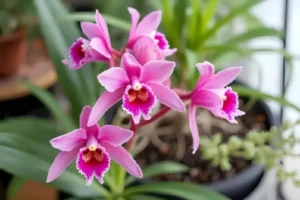
Cattleya orchids offer spectacular, fragrant blooms and adapt well to bright indoor conditions. Research from the American Orchid Society shows these plants respond exceptionally well to east-facing windows, where they receive gentle morning light without harsh afternoon sun.
Dendrobium nobile varieties provide stunning cascading blooms and are remarkably resilient indoors. These orchids appreciate the slight temperature drops that naturally occur in most homes during winter months, triggering their spectacular flowering displays.
Essential Requirements Overview
Indoor orchid success depends on mastering four key elements: light, water, humidity, and air circulation. Unlike outdoor gardening, where these factors fluctuate naturally, indoor cultivation gives you complete control over your orchids’ environment.
The beauty of indoor orchid growing lies in its predictability. Once you establish the right conditions, your orchids will respond consistently, making it easy to develop a reliable care routine that fits your schedule.
Creating the Perfect Indoor Environment
Lighting Requirements and Solutions
Light is the most critical factor in indoor orchid success. Most orchids require bright, indirect light—think of the dappled sunlight filtering through a forest canopy in their native habitats. Direct sunlight will scorch their leaves, while insufficient light prevents blooming.
East-facing windows provide ideal conditions for 90% of indoor orchids. Research from the University of Florida’s IFAS Extension demonstrates that morning sunlight combined with afternoon shade creates optimal growing conditions. If your east-facing window receives direct sun for more than 2-3 hours, hang a sheer curtain to diffuse the intensity.
For homes without suitable natural light, full-spectrum LED grow lights offer an excellent solution. Position lights 12-18 inches above your orchids and provide 12-14 hours of illumination daily. Quality LED systems consume minimal electricity while producing the specific light wavelengths orchids need for photosynthesis and blooming.
The “hand shadow test” provides a simple way to assess light levels: Hold your hand 6 inches above your orchid’s leaves at midday. A soft, barely visible shadow indicates perfect light intensity. No shadow means insufficient light, while a sharp, dark shadow suggests too much direct sun.
Temperature and Humidity Control
Indoor orchids thrive in the temperature ranges most humans find comfortable: 65-80°F during the day with nighttime drops of 10-15 degrees. This natural fluctuation, easily achieved in most homes, actually triggers blooming in many orchid species.
Humidity presents the biggest challenge for indoor growers. While orchids prefer 50-70% humidity, most homes maintain only 30-40%. The solution is creating microclimates rather than humidifying entire rooms.
Humidity trays offer the most effective solution for home growers. Fill shallow trays with pebbles, add water until it reaches halfway up the stones, then place orchid pots on top. As water evaporates, it creates a humid microenvironment around your plants. Research from the Missouri Botanical Garden confirms this method can increase local humidity by 15-20%.
Grouping orchids together naturally increases humidity through transpiration. Position 3-5 orchids within a 2-foot radius to create a beneficial microclimate where each plant contributes to the group’s humidity levels.
Air Circulation and Ventilation
Stagnant air is orchid enemy number one indoors. Proper air circulation prevents fungal diseases, strengthens stems, and improves nutrient uptake. In nature, orchids experience constant gentle breezes that keep their aerial roots healthy and dry between waterings.
A small oscillating fan running on low speed provides ideal air movement for indoor collections. Position the fan to create gentle air circulation without directly blowing on your plants. The goal is subtle movement of leaves and aerial roots, not strong drafts.
Ceiling fans also work excellently for orchid rooms, providing gentle, consistent air movement that mimics natural conditions. Studies from the International Orchid Center show that orchids grown with proper air circulation have 40% fewer disease issues compared to those in stagnant environments.
Step-by-Step Indoor Orchid Care Guide
Proper Watering Techniques and Schedule
The number one killer of indoor orchids is overwatering, not underwatering. Orchids’ epiphytic nature means their roots are designed to dry completely between waterings. Constantly wet conditions lead to root rot—the most common cause of orchid death.
The “ice cube method” works perfectly for beginners: Place 3 ice cubes on the potting medium weekly, allowing them to melt slowly. This provides approximately the right amount of water while preventing overwatering. Research from The Ohio State University confirms this method maintains optimal moisture levels for Phalaenopsis orchids.
For a more traditional approach, water thoroughly once weekly during growing season (spring/summer) and every 10-14 days during dormancy (fall/winter). Water early morning, allowing excess to drain completely. Never let orchids sit in standing water.
The “weight test” helps determine watering needs: Lift your orchid pot after watering to feel its weight when fully saturated. Check again after a few days—when the pot feels noticeably lighter, it’s time to water again.
Choosing the Right Potting Mix and Containers
Forget everything you know about regular potting soil—orchids require completely different growing mediums. Standard potting mix retains too much moisture and suffocates orchid roots. Instead, use specialized orchid bark mixes that provide drainage and air circulation.
Premium orchid bark forms the foundation of successful indoor growing mediums. Look for medium-grade bark chips (roughly pea-sized) that allow excellent drainage while providing root support. Many commercial orchid mixes combine bark with perlite and sphagnum moss for optimal moisture retention and drainage.
Clear plastic pots revolutionize indoor orchid growing by allowing you to monitor root health easily. Healthy orchid roots appear bright green when wet and silvery-gray when dry. Brown, mushy roots indicate problems requiring immediate attention.
Drainage is absolutely critical—every orchid pot must have multiple drainage holes. Consider double-potting: place orchids in clear plastic pots with excellent drainage, then set these inside decorative ceramic containers. This system provides beauty while maintaining proper drainage and allowing easy root inspection.
Fertilizing Your Indoor Orchids
Orchids are light feeders requiring dilute, frequent fertilization rather than heavy feeding. The mantra “weakly, weekly” perfectly describes optimal fertilization: use quarter-strength fertilizer every week during growing season rather than full-strength monthly applications.
Balanced fertilizers (20-20-20 or similar ratios) work well for most indoor orchids. During active growth periods (spring and summer), increase nitrogen slightly to promote healthy foliage. As blooming approaches, reduce nitrogen and maintain phosphorus levels to encourage flower development.
Water-soluble fertilizers provide the easiest application method for indoor growers. Mix according to package directions, then dilute to quarter strength. Apply during regular watering, ensuring fertilizer solution drains completely from pots.
Flush monthly with plain water to prevent salt buildup that can damage sensitive orchid roots. Signs of over-fertilization include brown leaf tips, reduced blooming, and white salt crystals on potting medium surface.
Troubleshooting Common Indoor Growing Problems
Identifying and Preventing Common Issues
Yellowing leaves often indicate natural aging rather than problems. Phalaenopsis typically lose their bottom leaves annually as new growth emerges from the top. However, multiple yellowing leaves suggest overwatering, insufficient light, or root problems requiring immediate attention.
Brown leaf tips usually result from low humidity, over-fertilization, or water quality issues. Increase humidity around affected plants and consider using distilled water if your tap water is heavily chlorinated or has high mineral content.
Failure to bloom frustrates many indoor growers, but solutions are straightforward. Ensure adequate light—most non-blooming orchids receive insufficient illumination. Provide proper temperature fluctuations between day and night, and avoid over-fertilizing with nitrogen, which promotes leaf growth at the expense of flowers.
Signs of Healthy vs. Struggling Orchids
Healthy indoor orchids display several unmistakable characteristics: Leaves appear firm, glossy, and evenly colored without brown spots or yellowing (except natural aging of bottom leaves). Roots show bright green coloration when wet and silvery-gray when dry. New growth emerges regularly from growing points.
Warning signs require immediate attention: Soft, wrinkled leaves indicate severe dehydration or root problems. Brown, mushy roots suggest root rot from overwatering. Black spots on leaves may indicate fungal infections requiring treatment and improved air circulation.
Regular inspection prevents minor issues from becoming major problems. Check your orchids weekly, examining both leaves and visible roots for changes. Early intervention saves plants and prevents problems from spreading to your entire collection.
When and How to Repot
Most orchids require repotting every 2-3 years when growing medium breaks down or plants outgrow their containers. Spring provides optimal timing for repotting, allowing plants to establish new roots during active growing season.
Signs demanding immediate repotting include: Potting medium decomposing into soil-like consistency, roots growing extensively outside pots, or presence of fungal growth in medium. Don’t wait for scheduled repotting if these conditions exist.
The repotting process involves gently removing plants from old containers, trimming dead or rotted roots with sterilized tools, and placing in fresh orchid bark mix. Choose pots only slightly larger than root systems—oversized containers retain too much moisture and delay new growth.
Advanced Tips for Orchid Success Indoors
Seasonal Care Adjustments
Winter care requires significant modifications as most orchids enter dormancy periods. Reduce watering frequency to every 10-14 days and discontinue fertilization from November through February. Many orchids require this rest period to trigger spring blooming.
Summer presents opportunities for enhanced growth with increased light, warmth, and humidity. Resume regular fertilization and consider moving orchids to brighter locations if available. However, protect from direct afternoon sun which can scorch leaves even indoors.
Spring triggers active growing seasons for most orchid varieties. This optimal time for repotting, dividing large plants, and resuming regular feeding schedules. Watch for new growth and adjust care accordingly.
Encouraging Blooming and Reblooming
Temperature fluctuations trigger blooming in most orchid species. Ensure 10-15 degree differences between day and night temperatures by placing plants near windows or using programmable thermostats. This natural cycle signals orchids to initiate flower spike development.
Proper rest periods are essential for reblooming. After flowers fade, reduce watering and eliminate fertilization for 6-8 weeks. This dormancy period allows plants to gather energy for next blooming cycle.
Patience rewards orchid growers more than any other virtue. Most orchids bloom annually, with some requiring 2-3 years between flowering periods. Focus on maintaining healthy plants rather than forcing blooms, and your patience will be rewarded with spectacular displays.
Creating Orchid Display Areas
Dedicate specific areas to orchid cultivation rather than scattering plants throughout your home. Grouping orchids together makes care easier while creating impressive displays that showcase their exotic beauty.
East-facing rooms or areas provide ideal conditions for most orchid collections. Consider installing humidity trays, adjustable shelving, and supplemental lighting to create professional-quality growing environments.
Rotation systems ensure all plants receive optimal care and display opportunities. Move recently bloomed orchids to prominent locations while returning spent bloomers to growing areas for recovery and preparation for next flowering cycle.
Conclusion
Growing orchids indoors successfully combines understanding their natural requirements with adapting these needs to indoor environments. The key principles—bright indirect light, proper drainage, adequate humidity, and appropriate watering—create conditions where orchids not only survive but thrive.
Remember that orchid cultivation is a journey of continuous learning and adjustment. Each plant teaches you something new about their preferences and requirements. Start with beginner-friendly varieties like Phalaenopsis, master their care, then expand your collection as confidence grows.
Your indoor orchid garden represents more than just houseplants—it’s a connection to some of nature’s most sophisticated and beautiful creations. With proper care and patience, these extraordinary plants will reward you with years of stunning blooms and the satisfaction of successfully cultivating one of the plant kingdom’s most prestigious families.
The techniques and knowledge you’ve gained here provide everything needed to begin your orchid journey. Trust the process, be patient with both yourself and your plants, and prepare to discover why orchid cultivation becomes a lifelong passion for millions of enthusiasts worldwide.
Frequently Asked Questions
How often should I water my indoor orchids?
Water once weekly during growing season (spring/summer) and every 10-14 days during dormancy (fall/winter). The ice cube method—3 cubes weekly—works perfectly for beginners and prevents overwatering.
What’s the best location for orchids in my home?
East-facing windows provide ideal conditions with bright morning light and afternoon shade. Avoid south-facing windows unless you can provide shade during harsh afternoon sun.
Why won’t my orchid bloom again?
Most orchids need proper rest periods, temperature fluctuations (10-15 degree day/night difference), and adequate light to rebloom. Patience is essential—many orchids bloom annually or even less frequently.
Can I use regular potting soil for orchids?
Never use regular potting soil—it retains too much moisture and suffocates orchid roots. Use specialized orchid bark mixes that provide excellent drainage and air circulation.
How do I know if my orchid is healthy?
Healthy orchids have firm, glossy leaves and bright green roots when wet (silvery-gray when dry). Regular new growth and absence of brown spots or mushy roots indicate good health.
What humidity level do orchids need indoors?
Orchids prefer 50-70% humidity, higher than most homes provide. Create microclimates using humidity trays filled with water and pebbles, or group plants together to increase local