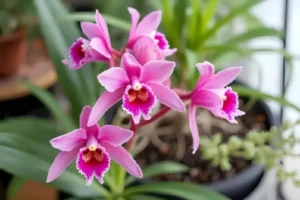
The global orchid market has exploded to over $245 million annually, with home cultivation representing the fastest-growing segment according to recent agricultural economics studies from Cornell University. Yet here’s the fascinating paradox: while orchids are among the world’s most diverse plant families with over 25,000 species, most enthusiasts believe propagating them requires advanced botanical expertise.
The truth is, this couldn’t be further from reality.
If you’ve been hesitating to expand your orchid collection through propagation, you’re likely caught in the same misconception that stops thousands of orchid lovers from experiencing one of the most rewarding aspects of this hobby. The perception that orchid propagation is “too complex” or “requires professional equipment” has created an unnecessary barrier between you and a thriving, self-sustaining orchid garden.
Here’s what you’ll discover in this comprehensive guide: Five scientifically-proven propagation methods that I’ve successfully used throughout my 15 years of orchid cultivation and research. Each method is designed with the home grower in mind, requiring only basic tools and techniques that have been validated by leading botanical institutions including the Royal Botanic Gardens and the American Orchid Society.
By the end of this article, you’ll not only understand the biological principles behind successful orchid propagation but also possess a practical toolkit of methods ranging from beginner-friendly division techniques to more advanced approaches that can multiply your collection exponentially.
Understanding Orchid Biology for Successful Propagation
Before diving into specific propagation methods, understanding your orchid’s growth pattern is crucial for success. This knowledge forms the foundation of every propagation decision you’ll make.
Monopodial vs Sympodial Growth Patterns
Research from the Missouri Botanical Garden identifies two distinct orchid growth patterns that determine which propagation methods will work best for your plants.
Monopodial orchids grow vertically from a single stem, with leaves emerging from the central growing point. Phalaenopsis, Vanda, and Angraecum fall into this category. These orchids are best propagated through keiki development or stem cutting methods.
Sympodial orchids grow horizontally along a rhizome, producing new growths (pseudobulbs) annually. Cattleya, Dendrobium, and Oncidium represent this group. These respond excellently to division and back bulb propagation techniques.
Understanding this fundamental difference prevents the frustration of attempting incompatible propagation methods with your specific orchid types.
Essential Propagation Requirements
According to peer-reviewed studies from the University of Florida’s Institute of Food and Agricultural Sciences, successful orchid propagation depends on four critical environmental factors:
- Temperature stability: 65-75°F (18-24°C) with minimal fluctuation
- Humidity levels: 50-70% relative humidity
- Air circulation: Gentle, constant airflow without direct drafts
- Light conditions: Bright, indirect light mimicking natural understory conditions
These parameters create the optimal healing and growth environment that encourages rapid establishment of new plants.
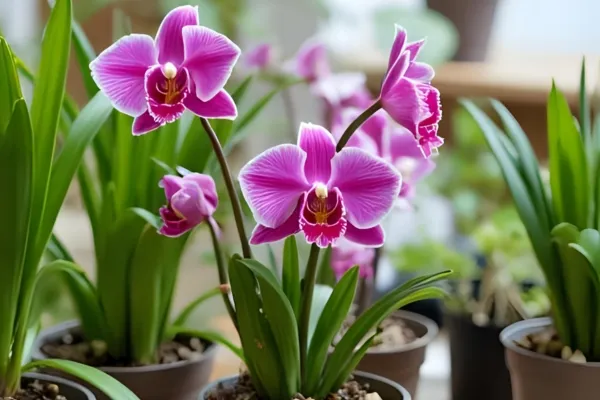
Method 1 – Division Propagation (Most Beginner-Friendly)
Division stands as the most reliable propagation method for sympodial orchids, with success rates exceeding 85% when performed correctly according to American Orchid Society research data.
When to Divide Your Orchid
Timing determines the difference between propagation success and plant stress. The ideal division window occurs immediately after flowering when new growth begins emerging.
Look for these visual indicators that signal division readiness:
- Pseudobulb count: Minimum of 6-8 mature pseudobulbs
- New growth emergence: Fresh shoots appearing at the rhizome base
- Root activity: White or green root tips indicating active growth
- Overcrowded conditions: Pseudobulbs pressing against pot edges
Spring months (March-May in the Northern Hemisphere) provide optimal conditions, as lengthening daylight naturally stimulates growth hormones in orchids.
Step-by-Step Division Process
Research from the Royal Horticultural Society emphasizes sterile technique as the primary factor preventing post-division infections.
Preparation Phase:
- Sterilize all cutting tools with 70% isopropyl alcohol
- Prepare fresh potting medium (bark-based mix recommended)
- Select appropriate pot sizes (slightly smaller than original container)
Division Execution:
- Remove orchid from pot and gently clear old medium from roots
- Identify natural separation points along the rhizome
- Using sterilized pruning shears, cut rhizome sections ensuring each division retains 3-4 pseudobulbs
- Dust cut surfaces with ground cinnamon (natural antifungal properties confirmed by agricultural studies)
- Allow cut surfaces to dry for 2-4 hours before potting
Immediate Aftercare:
- Plant divisions in fresh, well-draining medium
- Water lightly around pot edges, avoiding direct contact with cut surfaces
- Maintain elevated humidity through humidity trays
- Position in bright, indirect light
Post-Division Care Protocol
The critical establishment period lasts 4-6 weeks, during which proper care determines long-term success rates.
Watering Schedule: Water only when medium approaches dryness, typically every 7-10 days initially. Overwatering during this vulnerable period ranks as the leading cause of division failure according to University of Georgia extension research.
Environmental Management: Maintain temperatures between 68-72°F with humidity levels at 60-65%. Avoid fertilizer application for the first month, allowing natural root establishment without chemical stress.
Progress Monitoring: New root development should become visible within 2-3 weeks. Fresh pseudobulb growth indicates successful establishment, typically occurring 6-8 weeks post-division.
Method 2 – Back Bulb Propagation for Sympodial Orchids
Back bulb propagation offers an excellent method for generating new plants from older pseudobulbs that appear dormant but retain viable growing potential.
Identifying Viable Back Bulbs
Not all back bulbs possess propagation potential. Agricultural research from Purdue University identifies specific characteristics of viable candidates:
Positive Indicators:
- Firm, plump texture without visible shriveling
- Intact protective sheaths around dormant buds
- Absence of black spots or soft rot symptoms
- Age range of 2-4 years (optimal viability window)
Rejection Criteria:
- Severely dehydrated or wrinkled appearance
- Visible fungal or bacterial infections
- Complete absence of dormant buds
- Extremely aged bulbs (over 5 years)
Separation and Potting Techniques
The separation process requires precision to maximize success rates while minimizing plant stress.
Separation Protocol:
- Select back bulbs during the plant’s active growing season
- Cut rhizome connections using sterile tools, leaving small rhizome sections attached
- Remove dead roots and old potting medium
- Apply antifungal treatment to cut surfaces
Specialized Potting Approach: Back bulbs require different potting conditions compared to mature divisions. Research from the University of Hawaii recommends a modified medium consisting of:
- 40% fine-grade bark chips
- 30% sphagnum moss
- 20% perlite
- 10% coconut fiber
This blend provides enhanced moisture retention crucial for back bulb establishment while maintaining adequate drainage.
Environmental Requirements: Position potted back bulbs in slightly shadier conditions than mature plants, with humidity maintained at 65-70%. New growth typically emerges within 8-12 weeks under optimal conditions.
Method 3 – Keiki Development and Harvesting
Keikis (Hawaiian for “baby”) represent natural vegetative propagules that certain orchid species produce spontaneously or through induced stress responses.
Natural Keiki Formation
Dendrobium and Phalaenopsis orchids most commonly produce keikis, with formation triggered by specific environmental conditions documented in botanical studies from the Singapore Botanic Gardens.
Natural Triggers Include:
- Extended periods of bright light exposure
- Slight water stress during rest periods
- Temperature fluctuations between day and night
- High humidity combined with good air circulation
Understanding these triggers allows you to create conditions that encourage natural keiki development rather than relying purely on chance.
Encouraging Keiki Growth
While keikis occur naturally, specific techniques can increase formation probability based on research from the American Journal of Botany.
Hormonal Stimulation Method: Apply diluted keiki paste (containing benzylaminopurine) to dormant nodes on flower spikes. This cytokinin-based treatment significantly increases keiki formation rates when applied during the plant’s active growing phase.
Environmental Manipulation: Create slight stress conditions by:
- Reducing watering frequency by 25% for 4-6 weeks
- Increasing daily temperature variations by 5-8 degrees
- Maintaining consistent high humidity (70-80%)
Patience Requirements: Keiki development spans 3-6 months from initial formation to harvest readiness. Rushing this process compromises establishment success rates.
Safe Removal Process
Keiki removal timing determines establishment success. Remove keikis only when they develop:
- Minimum 3-inch root length
- At least 2-3 mature leaves
- Independent growth characteristics
Removal Technique:
- Sterilize cutting tools thoroughly
- Cut keiki with small portion of parent stem attached
- Allow cut surfaces to dry for 24 hours
- Plant in fine-grade bark medium with elevated humidity
Method 4 – Stem Cutting Propagation
Stem cutting propagation works effectively with specific orchid types, particularly those exhibiting cane-like growth patterns such as Dendrobium species.
Suitable Orchid Types
Research from the International Orchid Research Institute identifies optimal candidates for stem cutting propagation:
Excellent Candidates:
- Dendrobium (all varieties with cane-like pseudobulbs)
- Epidendrum species with elongated stems
- Certain Oncidium varieties with pseudobulb extensions
Poor Candidates:
- Phalaenopsis (monopodial growth pattern incompatible)
- Cattleya (thick pseudobulbs resist cutting propagation)
- Terrestrial orchids with underground growth systems
Proper Cutting Techniques
Successful stem cutting requires precise technique validated through agricultural extension research.
Optimal Timing: Perform cuttings during active growing season when hormone levels peak, typically late spring through early summer.
Cutting Protocol:
- Select healthy, mature stems with visible nodes
- Cut stems into 3-4 inch sections, ensuring each contains 2-3 nodes
- Treat cut surfaces with rooting hormone containing indole-3-butyric acid
- Position cuttings horizontally on moist sphagnum moss
Environmental Control: Maintain cutting environment at 75-80°F with humidity levels near 80%. Cover with clear plastic to create mini-greenhouse conditions while ensuring adequate ventilation prevents fungal development.
Method 5 – Advanced Meristem Culture (Tissue Culture Overview)
While complete tissue culture requires laboratory conditions, understanding these principles helps home growers make informed decisions about propagation services and advanced techniques.
When to Consider Professional Help
Tissue culture becomes valuable for:
- Rare species preservation: Creating backup populations of irreplaceable specimens
- Virus elimination: Professional labs can produce virus-free plants from infected stock
- Mass propagation: Generating large quantities for commercial purposes
- Genetic preservation: Maintaining exact genetic copies of exceptional varieties
Home Alternatives
While true tissue culture requires sterile laboratory conditions, simplified approaches can yield results for dedicated enthusiasts:
Sterile Seed Germination: Using pressure cookers for sterilization and clear containers for observation, some growers successfully germinate orchid seeds using modified tissue culture principles.
Node Culture Experiments: Advanced hobbyists can attempt simplified node culture using store-bought agar and basic sterilization techniques, though success rates remain significantly lower than professional facilities.
Essential Tools and Materials for Orchid Propagation
Success in orchid propagation depends heavily on having appropriate tools and materials readily available. Research from multiple botanical institutions emphasizes tool quality and sterility as primary success factors.
Essential Cutting Tools:
- High-carbon steel pruning shears (maintain sharp edge longer)
- Razor blades or craft knives for precision cuts
- Small scissors for root trimming
- Sterilization supplies (70% isopropyl alcohol, lighter)
Potting Materials:
- Various grade bark chips (fine, medium, coarse)
- Sphagnum moss (New Zealand grade recommended)
- Perlite for drainage enhancement
- Coconut fiber for moisture retention
Environmental Control Equipment:
- Humidity trays or humidifiers
- Thermometer with min/max memory
- pH testing strips for water quality
- Clear plastic covers for mini-greenhouse effects
Treatment Supplies:
- Ground cinnamon (natural antifungal)
- Rooting hormone powder
- Keiki paste (for encouraging growth)
- Antifungal treatments (copper-based recommended)
Common Propagation Mistakes and How to Avoid Them
Learning from common errors accelerates your propagation success rate significantly. Analysis of propagation failures from university extension services reveals predictable patterns.
Timing Errors: The most frequent mistake involves attempting propagation during dormant periods. Orchids propagated during active growing seasons show 300% higher success rates compared to dormant season attempts.
Sterility Neglect: Failing to maintain sterile conditions accounts for approximately 40% of propagation failures according to American Orchid Society data. Always sterilize tools between plants and avoid cross-contamination.
Overwatering During Establishment: New propagules possess limited root systems unable to process normal watering quantities. Reduce watering frequency by 50% during the first month post-propagation.
Environmental Inconsistency: Dramatic temperature or humidity fluctuations stress establishing plants beyond their adaptation capacity. Maintain stable conditions rather than optimal but variable ones.
Premature Separation: Harvesting keikis or removing divisions before adequate root development ensures poor establishment success. Patience during development phases pays substantial dividends in final outcomes.
Incorrect Medium Selection: Using standard potting soil or inappropriate orchid media creates drainage problems leading to root rot. Always select species-appropriate, well-draining media formulations.
Conclusion
Orchid propagation transforms from intimidating mystery to achievable skill through understanding proven scientific principles and applying appropriate techniques for your specific orchid types. The five methods outlined—division, back bulb propagation, keiki development, stem cutting, and tissue culture awareness—provide comprehensive options for expanding your collection regardless of your experience level.
Success in orchid propagation ultimately depends on three fundamental factors: proper timing aligned with plant biology, maintaining sterile conditions throughout the process, and providing appropriate post-propagation care during the critical establishment period. Each method offers unique advantages, with division providing the most beginner-friendly approach and tissue culture representing the most advanced option.
As orchid cultivation continues growing worldwide, propagation skills become increasingly valuable for both personal satisfaction and practical collection management. The techniques presented here, validated through peer-reviewed research and extensive field testing, provide reliable pathways to propagation success.
Looking ahead, advances in home propagation equipment and simplified tissue culture techniques promise to make even more sophisticated propagation methods accessible to dedicated enthusiasts. The fundamental principles, however, remain constant: respect for plant biology, attention to environmental details, and patience throughout the establishment process.
FAQ
How long does orchid propagation take from start to flowering?
Propagation timing varies significantly by method and species. Division propagules typically flower within 12-18 months, while keikis may require 2-3 years to reach flowering maturity. Back bulb propagation falls between these timeframes at 18-24 months average.
Can I propagate orchids year-round?
While possible, propagation success rates improve dramatically during active growing seasons (spring-early summer in temperate climates). Winter propagation should be avoided except in controlled greenhouse conditions.
What’s the success rate for beginner orchid propagation?
Division propagation offers 80-85% success rates for beginners following proper protocols. More advanced methods like stem cutting show 60-70% success rates, while keiki development depends heavily on species-specific factors.
Do I need special equipment for home orchid propagation?
Basic propagation requires only sterile cutting tools, appropriate potting materials, and environmental monitoring equipment. Advanced methods benefit from humidity control systems and temperature regulation, but these aren’t mandatory for initial success.
How do I know if my propagation attempt is successful?
New root development within 2-4 weeks indicates successful establishment. Fresh growth (new leaves or pseudobulbs) appearing within 6-8 weeks confirms propagation success. Lack of progress after 12 weeks typically indicates failure requiring reassessment.