Did you know that over 75% of orchid deaths are directly linked to improper repotting timing and techniques? This staggering statistic from the American Orchid Society reveals a critical truth: even the most devoted orchid enthusiasts often struggle with one of the most fundamental aspects of orchid care.
The problem is clear – while orchids are remarkably resilient plants, they’re also incredibly sensitive to root disturbance. Repot too early, and you’ll interrupt crucial growth cycles. Wait too long, and your orchid suffocates in decomposed growing medium. Miss the seasonal window, and you could set your plant back months or even years in its blooming cycle.
Here’s what you’ll master today: the exact timing indicators that signal when your orchid is ready for repotting, a fail-safe seasonal schedule that works for all major orchid varieties, and the step-by-step process that ensures your orchid not only survives but thrives after repotting. By the end of this guide, you’ll confidently recognize the signs, choose the perfect timing, and execute a repotting process that promotes healthier roots and more spectacular blooms.
Why Timing Matters in Orchid Repotting Success
Understanding when to repot orchids isn’t just about convenience – it’s about working with your plant’s natural biological rhythms to ensure optimal recovery and future growth.
The Science Behind Orchid Root Development
Orchids follow predictable growth patterns that directly influence their ability to handle repotting stress. According to research from the University of Florida’s Environmental Horticulture Department, orchids experience distinct phases of root activity throughout the year.
During active growth periods, orchids produce new root tips that appear bright green or white. These fresh roots are incredibly resilient and can quickly establish themselves in new growing medium. Conversely, during dormant periods, existing roots become more fragile and susceptible to damage.
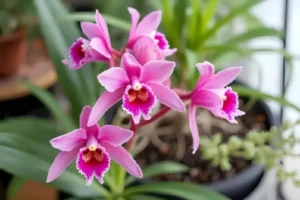
Key insight: Epiphytic orchids (like Phalaenopsis and Cattleyas) have evolved to anchor themselves to tree bark in nature. This means their roots are designed to grip and adapt to new surfaces – but only when they’re in active growth mode.
Consequences of Poor Repotting Timing
Repotting at the wrong time creates a cascade of problems that can take months to resolve:
- Root shock syndrome: Dormant roots struggle to recover from disturbance, leading to widespread root loss
- Delayed blooming cycles: Stress from poorly-timed repotting can postpone flowering by 6-12 months
- Increased susceptibility to disease: Damaged roots during dormant periods become entry points for bacterial and fungal infections
- Stunted new growth: Energy diverted to root recovery means reduced leaf and pseudobulb development
Studies from the Royal Horticultural Society show that orchids repotted during their natural growth season recover 300% faster than those repotted during dormancy.
7 Clear Signs Your Orchid Needs Repotting Now
Learning to read your orchid’s signals is crucial for timing repotting correctly. Here are the unmistakable indicators that your plant is ready for a new home.
Visual Root Indicators
1. Aerial roots growing extensively outside the pot When you see thick, silvery roots cascading over the pot edges and growing into the air, your orchid is telling you it needs more space. These aerial roots are natural – but when they outnumber the roots actually in the pot, it’s time to repot.
2. Roots circling the inside of clear plastic pots In transparent pots, you can easily observe root development. When roots form dense circles around the pot’s perimeter or spiral extensively at the bottom, your orchid has outgrown its current container.
3. Brown, mushy, or hollow roots visible through clear containers Healthy orchid roots should be firm and either green (when moist) or silvery-white (when dry). Any brown, soft, or papery roots indicate the growing medium has broken down and is retaining too much moisture.
Growing Medium Breakdown Signals
4. Bark chips or moss appearing dark and decomposed Fresh orchid bark should maintain its natural color and structure. When bark becomes dark brown or black, crumbles easily, or develops a sour smell, it’s no longer providing proper drainage and aeration.
5. Water taking too long to drain from the pot If water sits on the surface for more than 10-15 seconds before draining, your growing medium has likely broken down into smaller particles that impede drainage – a critical problem for orchid root health.
Performance-Based Warning Signs
6. Reduced blooming frequency or flower quality Orchids in degraded growing medium often show decreased flowering performance. If your previously reliable bloomer starts skipping seasons or producing fewer/smaller flowers, repotting may restore its vigor.
7. New growth appearing stunted or yellowish When fresh pseudobulbs or leaves emerge smaller than previous growth or show yellowing despite proper light conditions, it often indicates the root system is struggling in deteriorated medium.
When to Repot Orchids: Seasonal Timing Guide
Timing your repotting with natural growth cycles dramatically improves success rates and reduces plant stress.
Best Months for Repotting Different Orchid Types
Phalaenopsis orchids: Late spring to early summer (May-June in Northern Hemisphere) These popular “moth orchids” typically finish blooming in late winter to spring. Repot immediately after the bloom spike is cut, when new leaf growth becomes visible at the crown.
Cattleya orchids: Late spring through early fall (May-September) Cattleyas show clear growth patterns with new pseudobulb development. Repot when new shoots are 2-3 inches tall but before roots emerge from the base.
Dendrobium orchids: Post-blooming period specific to variety
- Nobile-type dendrobiums: Repot in spring after blooming ends
- Phalaenopsis-type dendrobiums: Late spring to early summer, similar to Phalaenopsis
Oncidium alliance orchids: Spring through early summer (April-July) Watch for new pseudobulb growth beginning. Repot when new growth is visible but before extensive root development occurs.
Post-Bloom Timing Strategy
The golden window for most orchids occurs 4-8 weeks after blooming ends. During this period:
- Energy previously devoted to flower production redirects to root and vegetative growth
- Stress hormones from blooming have subsided
- Natural growth hormones are elevated, promoting rapid recovery
- Environmental conditions (longer days, warmer temperatures) support active growth
Emergency Repotting Situations
Sometimes orchids require immediate repotting regardless of season:
- Severe root rot discovered during inspection
- Growing medium completely broken down and staying soggy
- Pest infestations in the growing medium
- Accidental damage to the current pot
In emergency situations, take extra care with post-repotting conditions – provide bright indirect light, maintain consistent humidity, and monitor daily for signs of stress.
Step-by-Step Orchid Repotting Process
Following a systematic approach ensures your orchid experiences minimal stress and maximum success.
Essential Tools and Materials
Before beginning, gather these critical supplies:
- Sharp, sterilized cutting tools (razor blade or pruning shears)
- Fresh, appropriate growing medium (bark mix for epiphytes, specialized mix for terrestrials)
- New pot with drainage holes (typically same size or one size larger)
- 70% isopropyl alcohol for sterilization
- Bamboo stakes for support if needed
- Soft brush for cleaning roots
Pre-Repotting Preparation
1. Choose the optimal day Select a day when you can monitor your orchid closely for 24-48 hours afterward. Avoid repotting before travel or during busy periods.
2. Stop watering 3-5 days before repotting Slightly dry roots are easier to handle and less prone to breaking during the repotting process.
3. Prepare your workspace Work in bright, indirect light on a clean surface. Have all materials within easy reach.
Safe Root Handling Techniques
1. Remove the orchid gently Turn the pot upside down and tap gently to release the plant. Never pull the orchid by its leaves or pseudobulbs.
2. Clean away old growing medium Use your fingers and a soft brush to remove old bark and debris. Work carefully to avoid breaking healthy roots.
3. Inspect and trim roots systematically
- Keep: Firm, plump roots (green when moist, silvery when dry)
- Remove: Brown, mushy, hollow, or papery roots
- Sterilize tools between cuts to prevent disease spread
4. Allow cut surfaces to dry After trimming damaged roots, let cut surfaces air dry for 15-30 minutes before potting to reduce infection risk.
Choosing the Right New Container
Size considerations:
- Same size pot: If you removed minimal roots and want to control growth
- One size larger: If the root system was healthy and filled the previous pot
- Smaller pot: If you removed significant damaged root material
Material preferences:
- Clear plastic: Allows root monitoring and provides some photosynthesis support
- Clay pots: Provide better stability for top-heavy plants and enhanced drainage
- Mesh baskets: Ideal for orchids preferring maximum air circulation
Common Repotting Mistakes to Avoid
Learning from others’ mistakes can save your orchids from unnecessary stress and potential loss.
Timing Errors That Harm Orchids
Repotting during active blooming Never repot an orchid in flower unless facing a true emergency. The stress will cause immediate flower drop and can impact the next blooming cycle.
Rushing dormant season repotting Impatience leads many growers to repot during fall and winter when orchids are conserving energy. Wait for visible signs of new growth before proceeding.
Ignoring species-specific timing While general principles apply, different orchid types have unique timing preferences. Research your specific orchid variety’s natural growth pattern.
Container and Medium Selection Mistakes
Using pots without adequate drainage Beautiful decorative pots often lack sufficient drainage holes. Orchids need rapid water drainage to prevent root rot.
Choosing inappropriate growing medium Garden soil, regular potting mix, or fine particles retain too much moisture for most orchids. Stick to chunky, well-draining orchid-specific media.
Overpacking the growing medium Firmly packed bark eliminates air spaces that orchid roots require. The medium should be snug but not compressed.
Post-Repotting Care for Optimal Recovery
Your orchid’s care in the weeks following repotting determines long-term success.
Watering Schedule Adjustments
Wait before the first watering Allow 5-7 days after repotting before watering to let any cut root surfaces heal and reduce infection risk.
Monitor moisture levels closely Fresh growing medium behaves differently than aged medium. Check moisture levels daily for the first month to establish proper watering frequency.
Water thoroughly but less frequently When you do water, soak the medium completely, then allow excess to drain. New roots need consistent moisture to establish but can’t tolerate waterlogged conditions.
Light and Temperature Management
Provide bright, indirect light Avoid direct sunlight for 2-3 weeks after repotting. Stressed roots can’t support the high transpiration rates that direct light demands.
Maintain stable temperatures Keep temperatures within your orchid’s preferred range and avoid dramatic fluctuations that could add additional stress.
Increase humidity if possible Higher humidity (50-70%) helps reduce transpiration stress while roots re-establish. Use humidity trays or room humidifiers if needed.
Expect a recovery period Don’t be alarmed if your orchid shows little new growth for 4-6 weeks after repotting. This is normal as the plant focuses energy on root development.
Conclusion
Mastering the timing of orchid repotting transforms this potentially stressful process into a powerful tool for promoting healthy growth and spectacular blooms. The key principles we’ve covered – recognizing clear visual signals, working with natural growth cycles, and following systematic techniques – will serve you throughout your orchid-growing journey.
Remember that successful repotting begins with patient observation. Your orchids will clearly communicate their needs through root development, growing medium condition, and overall performance. By responding to these signals at the optimal seasonal timing, you’re setting the foundation for years of thriving growth.
The investment in learning proper repotting techniques pays dividends in healthier plants, more reliable blooming, and the deep satisfaction of successfully caring for these remarkable plants. Each successful repotting builds your confidence and deepens your understanding of orchid biology.
As you continue developing your orchid expertise, remember that every species has unique preferences, and every plant is an individual. Use these guidelines as your foundation, but always observe and adapt to your specific growing conditions and orchid varieties
Frequently Asked Questions
How often should I repot my orchids?
Most orchids need repotting every 18-24 months, when the growing medium breaks down or the plant outgrows its container. Fast-growing varieties may need annual repotting, while slow growers can sometimes go 3 years.
Can I repot an orchid that’s growing a flower spike?
Avoid repotting orchids with developing flower spikes unless facing an emergency like severe root rot. Wait until blooming is complete to minimize stress and prevent flower drop.
What’s the difference between repotting and dividing orchids?
Repotting involves moving an orchid to fresh growing medium and possibly a new container. Dividing means separating a mature orchid into multiple plants, typically done during repotting when plants have multiple growth points.
Should I water immediately after repotting?
Wait 5-7 days before watering to allow cut root surfaces to heal. This reduces the risk of bacterial or fungal infections entering through fresh wounds.
My orchid looks wilted after repotting. Is this normal?
Some temporary wilting is normal as roots adjust to new conditions. Maintain proper humidity and avoid direct sunlight. If wilting persists beyond 2 weeks, check for root problems or environmental stress.
Can I use regular potting soil for orchids?
Never use regular potting soil for epiphytic orchids. It retains too much moisture and lacks proper drainage. Use specialized orchid bark mixes or inorganic media designed for orchid cultivation.